Houdini's procedural roots
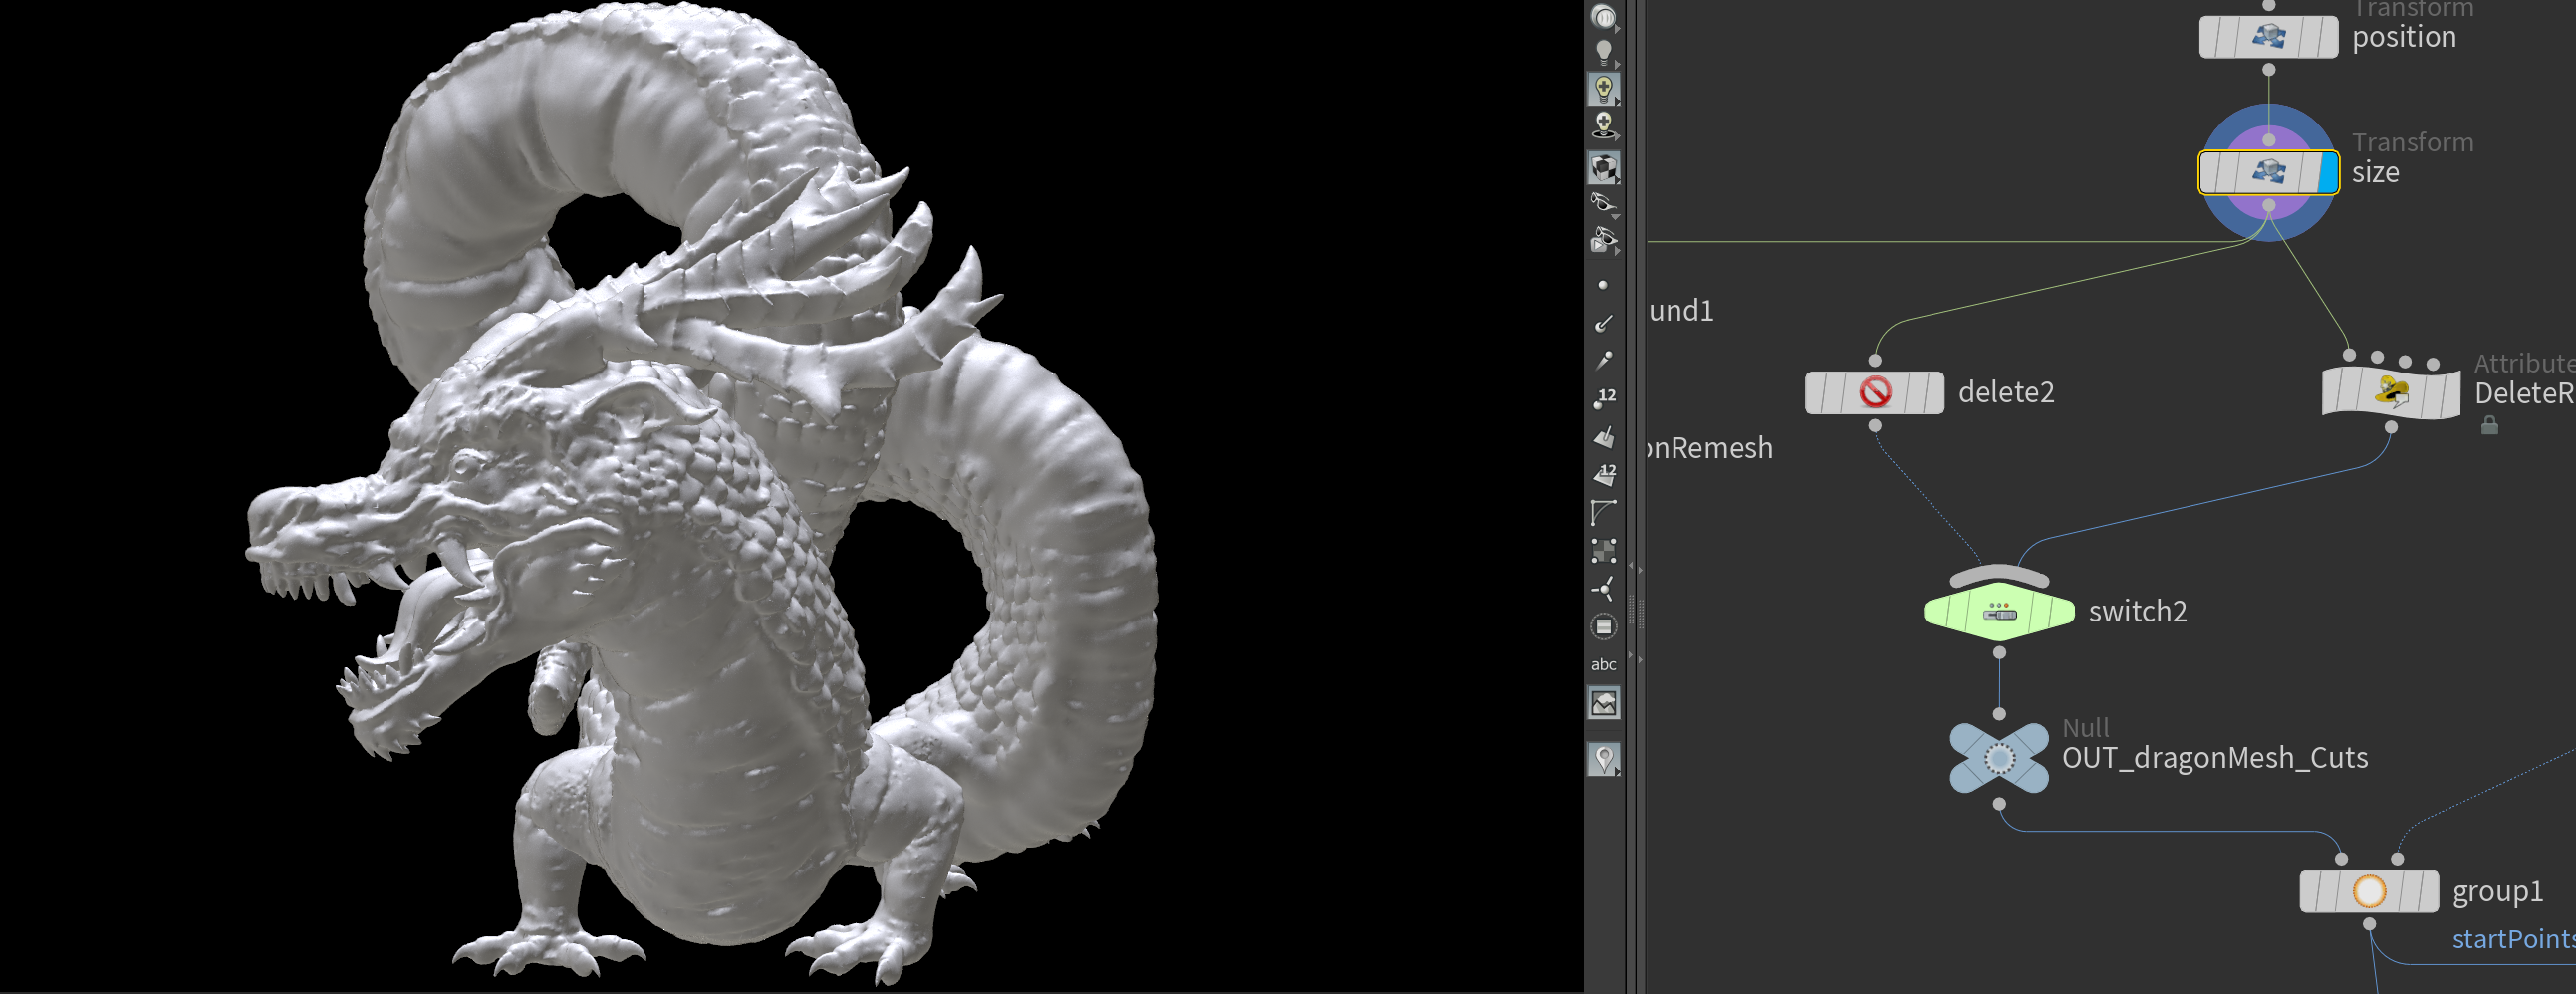
Step 1: Add your model inside Houdini
The first step is to bring your model, you can either use a Houdini model or bring it from other software, the key is that your object should be a single connected mesh, because our animated veins will walk on the model surface.

Step 2: Delete points with delete by range
There are many ways to achieve an effect or animation inside Houdini. For this part I present you the easiest and the complex one. The easiest would be to use an all set node that help you with what you need. And that's the "Delete node", set the operation to "delete by range" from the delete node, remember to change the node entity to points, and set a range.
*With both options try to keep your mesh connected, we need the edges of the input surface geometry to be connected.
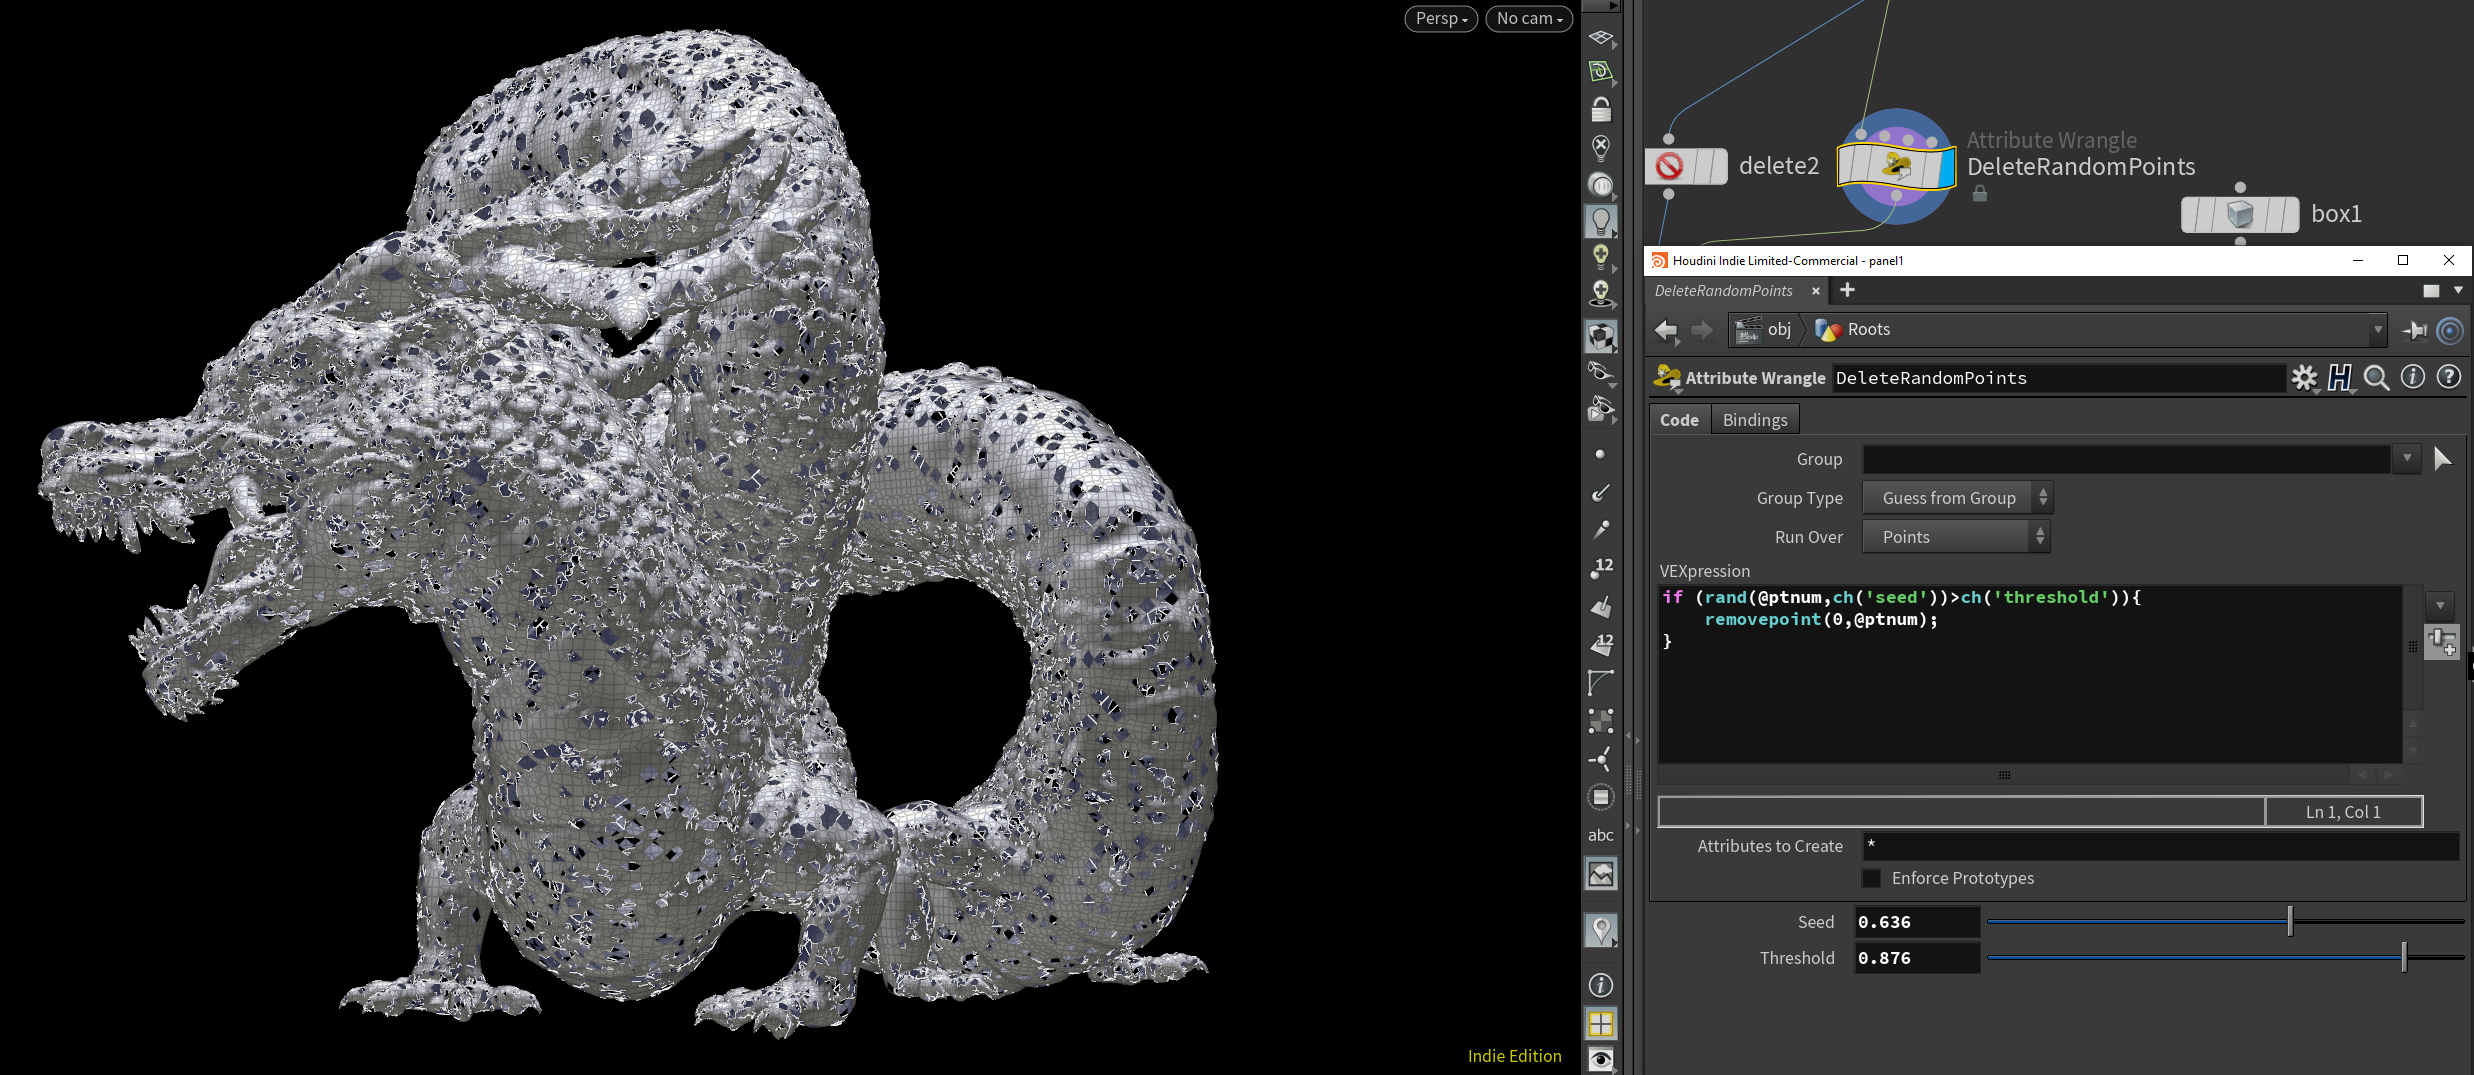
Step 2: Deleting points using an Attribute Wrangle
The attribute wrangle allows us to tweak attributes from the incoming geometry by executing some VEX code.I used a condition to remove points by creating a random value for each point number and evaluated by using a threshold value.
if (rand(@ptnum,ch('seed'))>ch('threshold')) { removepoint(0,@ptnum); }

Step 3: Starting Points
For our roots we need to stablish the starting points and end points from our main model, so for this part I used Group node, with the name "startPoints", and by activating the "Keep in Bounding Regions", you can use a box, sphere or another objects to contain the area of selected points.
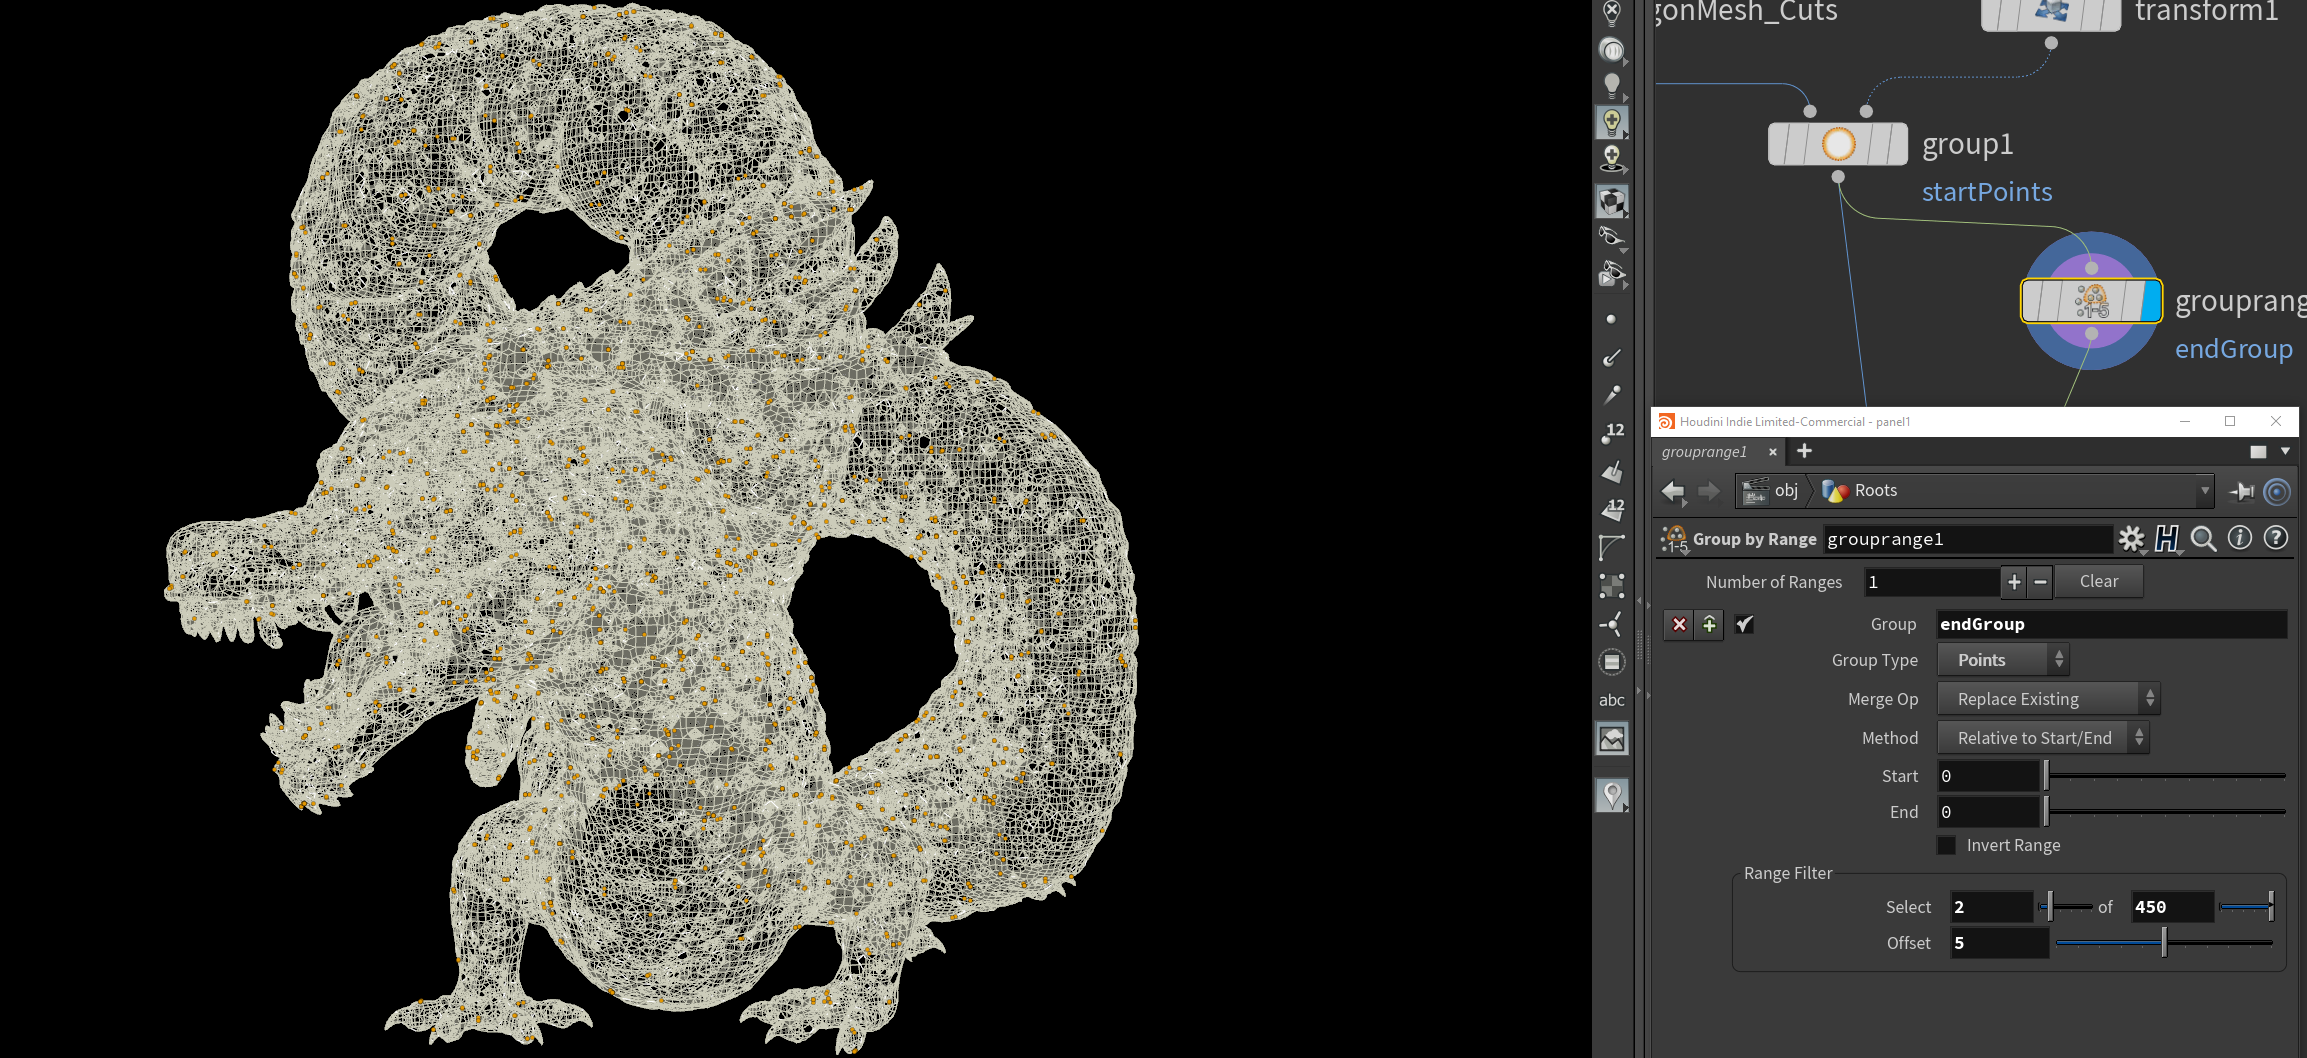
Step 4: End Points
*Remember always to start with a small amount of points, these are going to be limited by your pc power.
We will use another group of points called "endPoints",(You can name both groups however you want, the important here is to have the names, because we are going to use them in the next step).For this part I used "group by range" node, in the Group type change the option into points, and then select a range, to get some points.
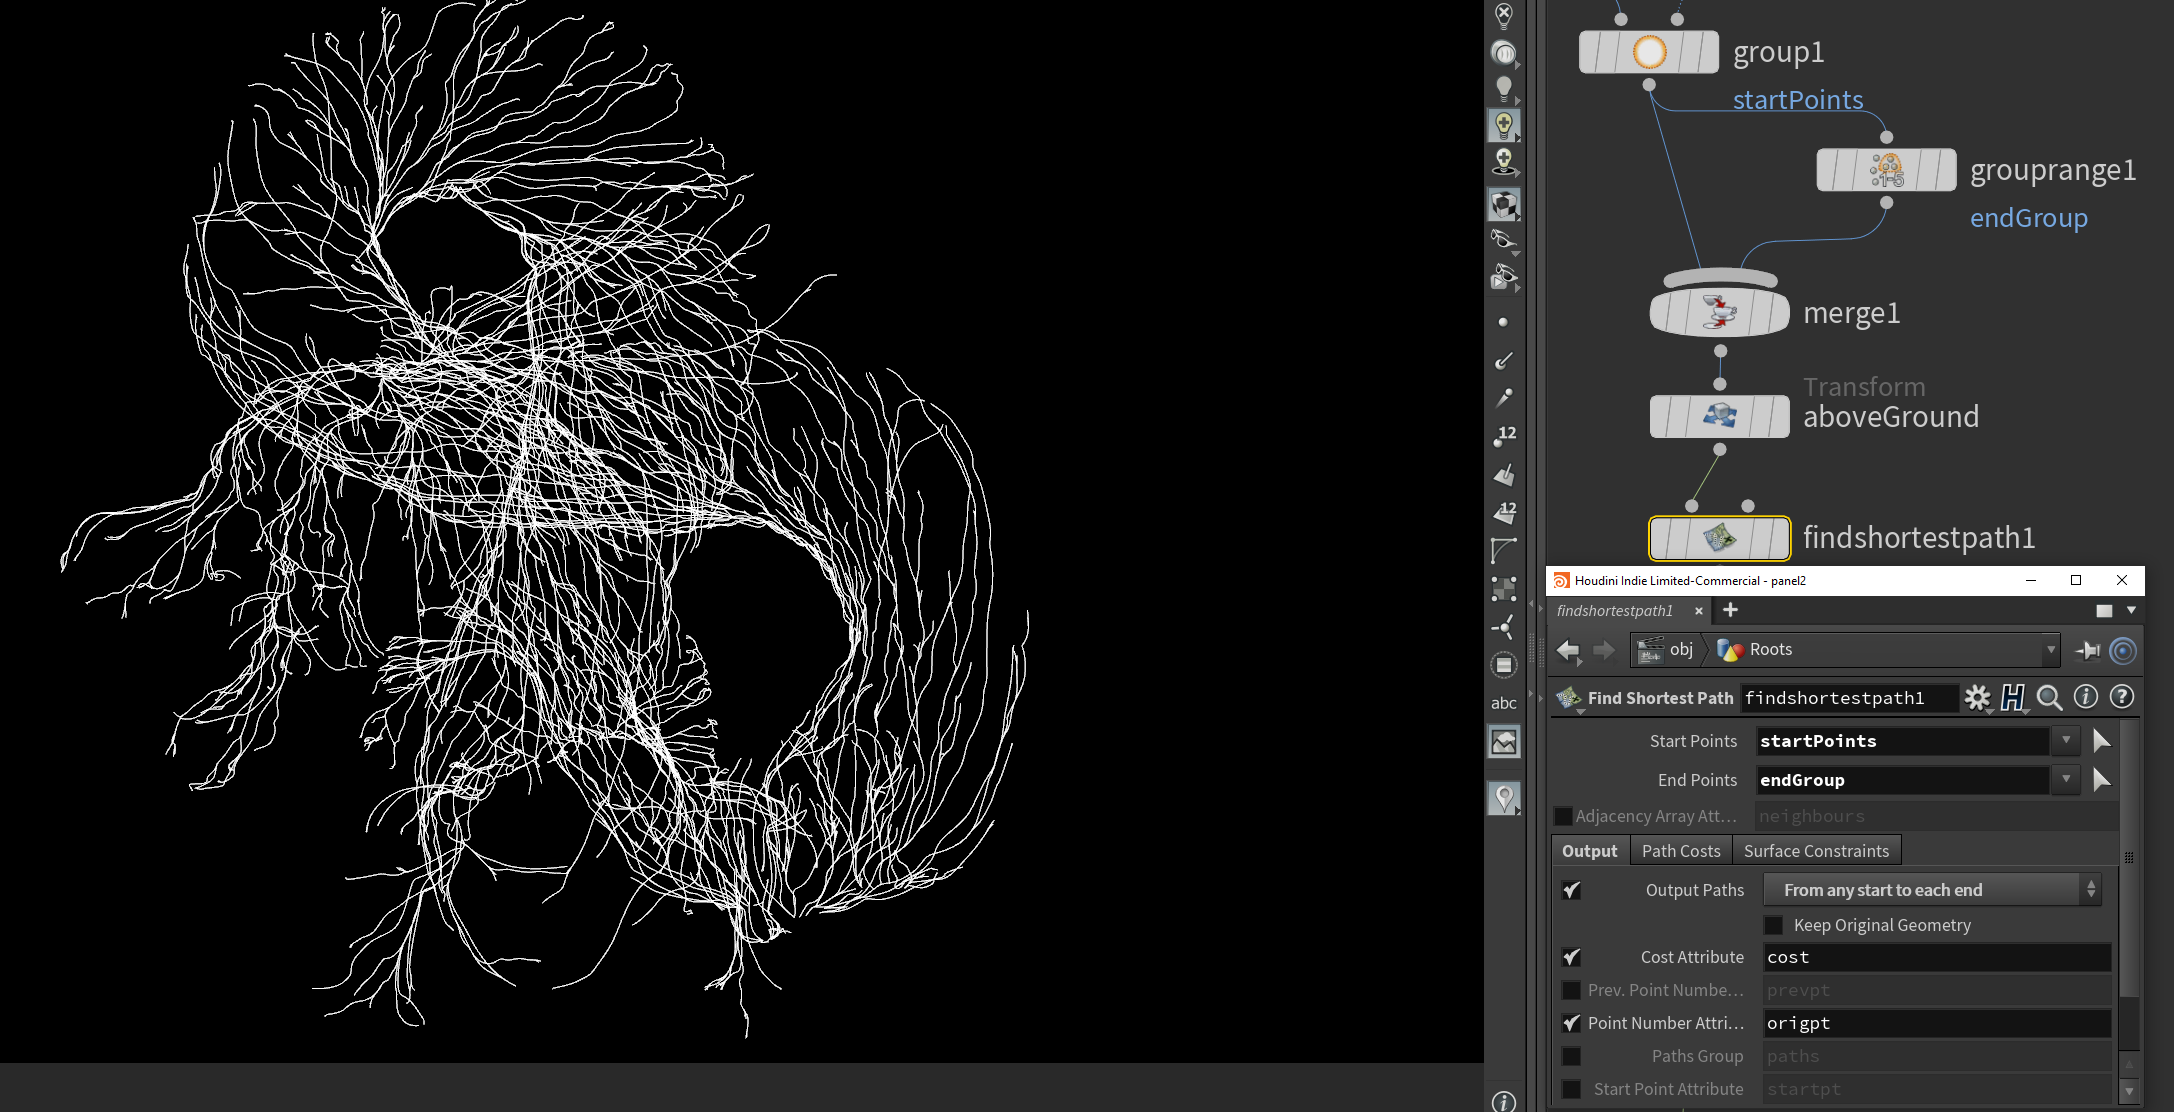
Step 5: Find Shortest Path
Here is where you will start to see some magic. According to Houdini's documentation, from sideFx (shortest path link) "This node finds the shortest paths through edges of the input surface geometry...". You can find a lot of data on how to create some amazing visuals with this powerful node. For this example you just need to tweak three parts. First add the "startPoints" group created in the step 3 to the Start Points option, then add your "endPoints" to the End Points Section. Now for last, go to selection menu on "Output Paths", we're going to use "From any start to each end".
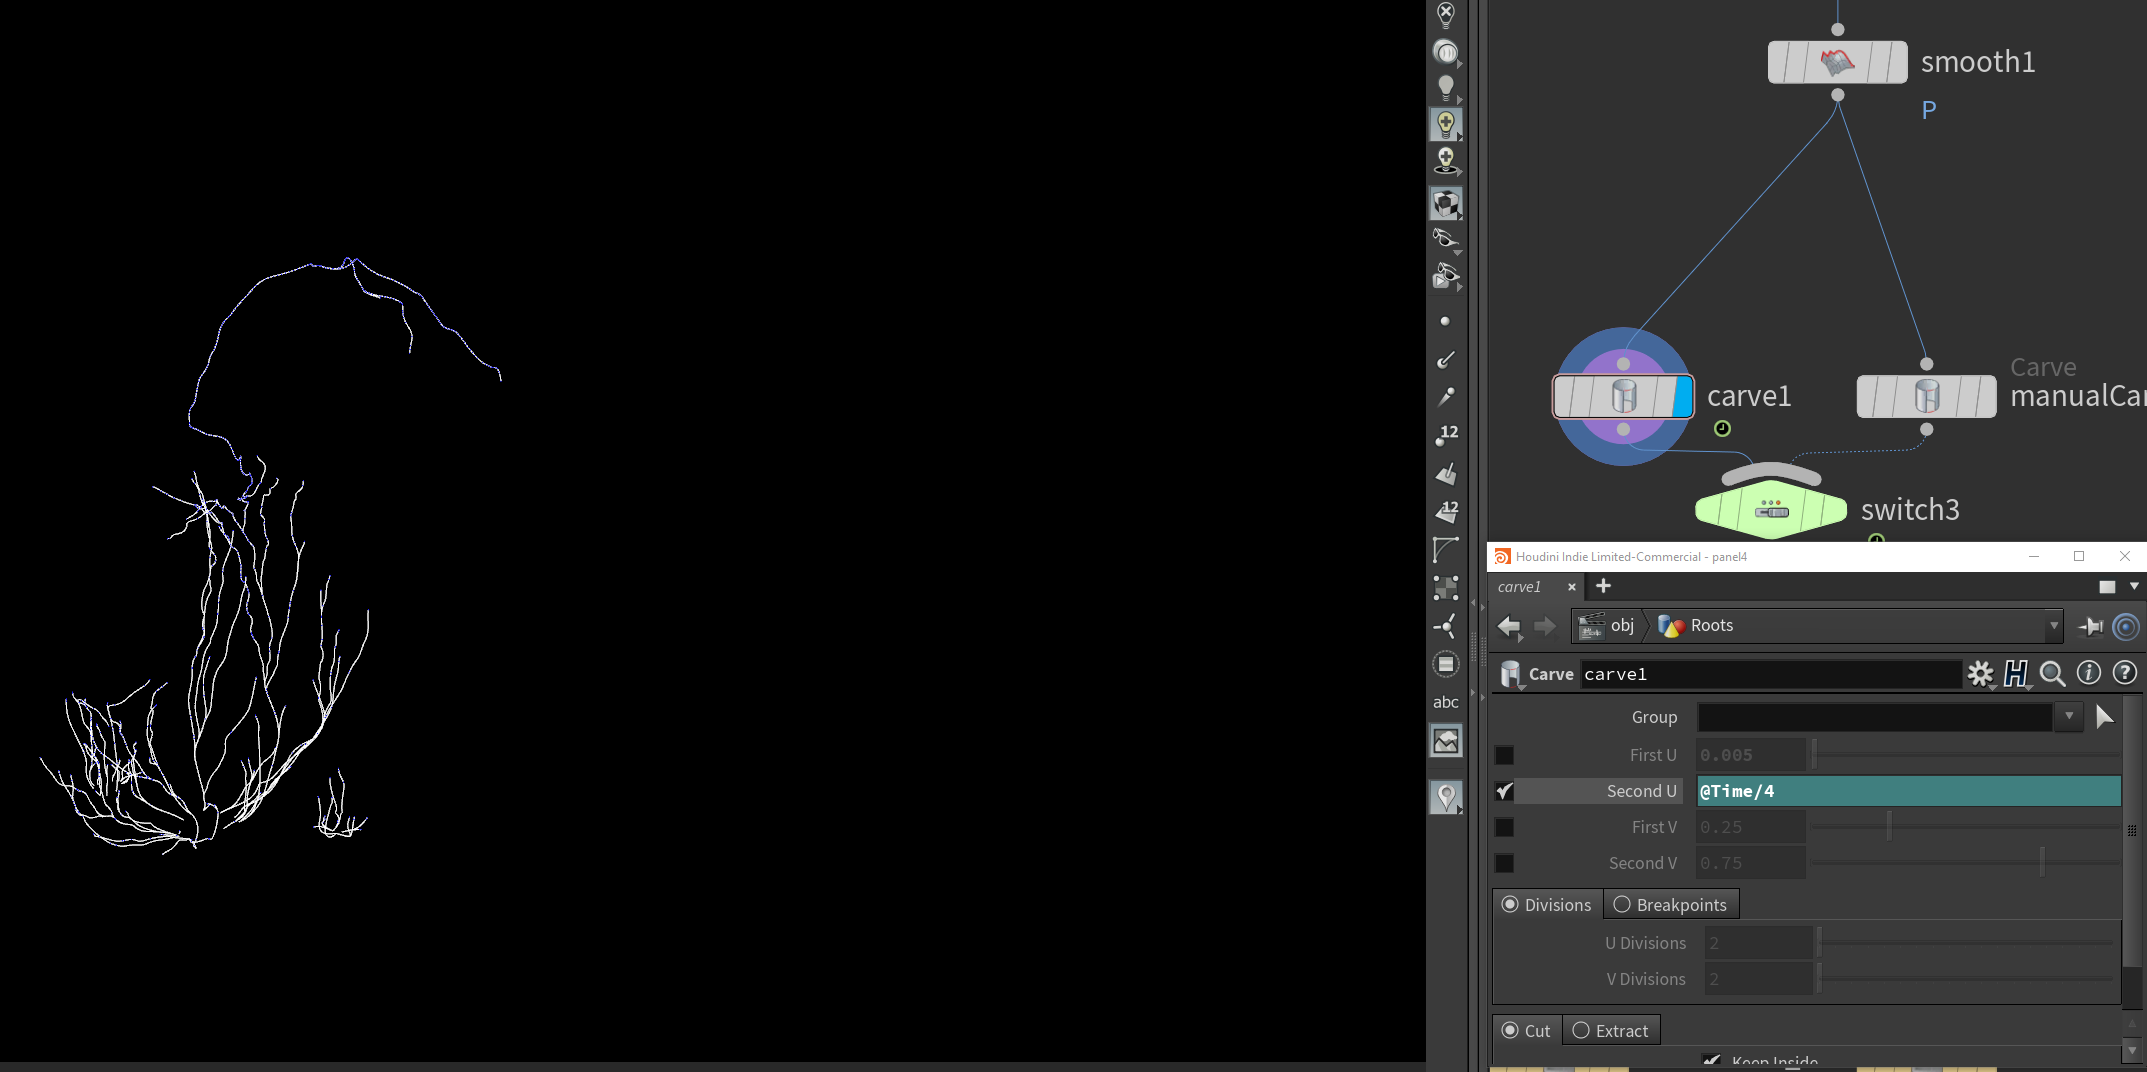
Step 6: Carve Node
This is the main key for the animation, the "carve node" slices, or extract points from a primitive. By setting the "First U" option as close to 0, or even turn it off. For this example you just need to use the "Second U" option. I made some tests with two methods for the roots animation, one was manual, here you can set a range of keyframes, and add them a value from 0 to 1... But we're going to use another option, you only need the number of seconds for your animation to be completed, for this example I used 4 seconds, so instead of adding some keyframes we use the expression @Time/4.
Houdini | Root Animation
Congratulations!
There's some bonus steps to personalize more your root animation. You'll find them below.
Bonus
The "curve u" attribute
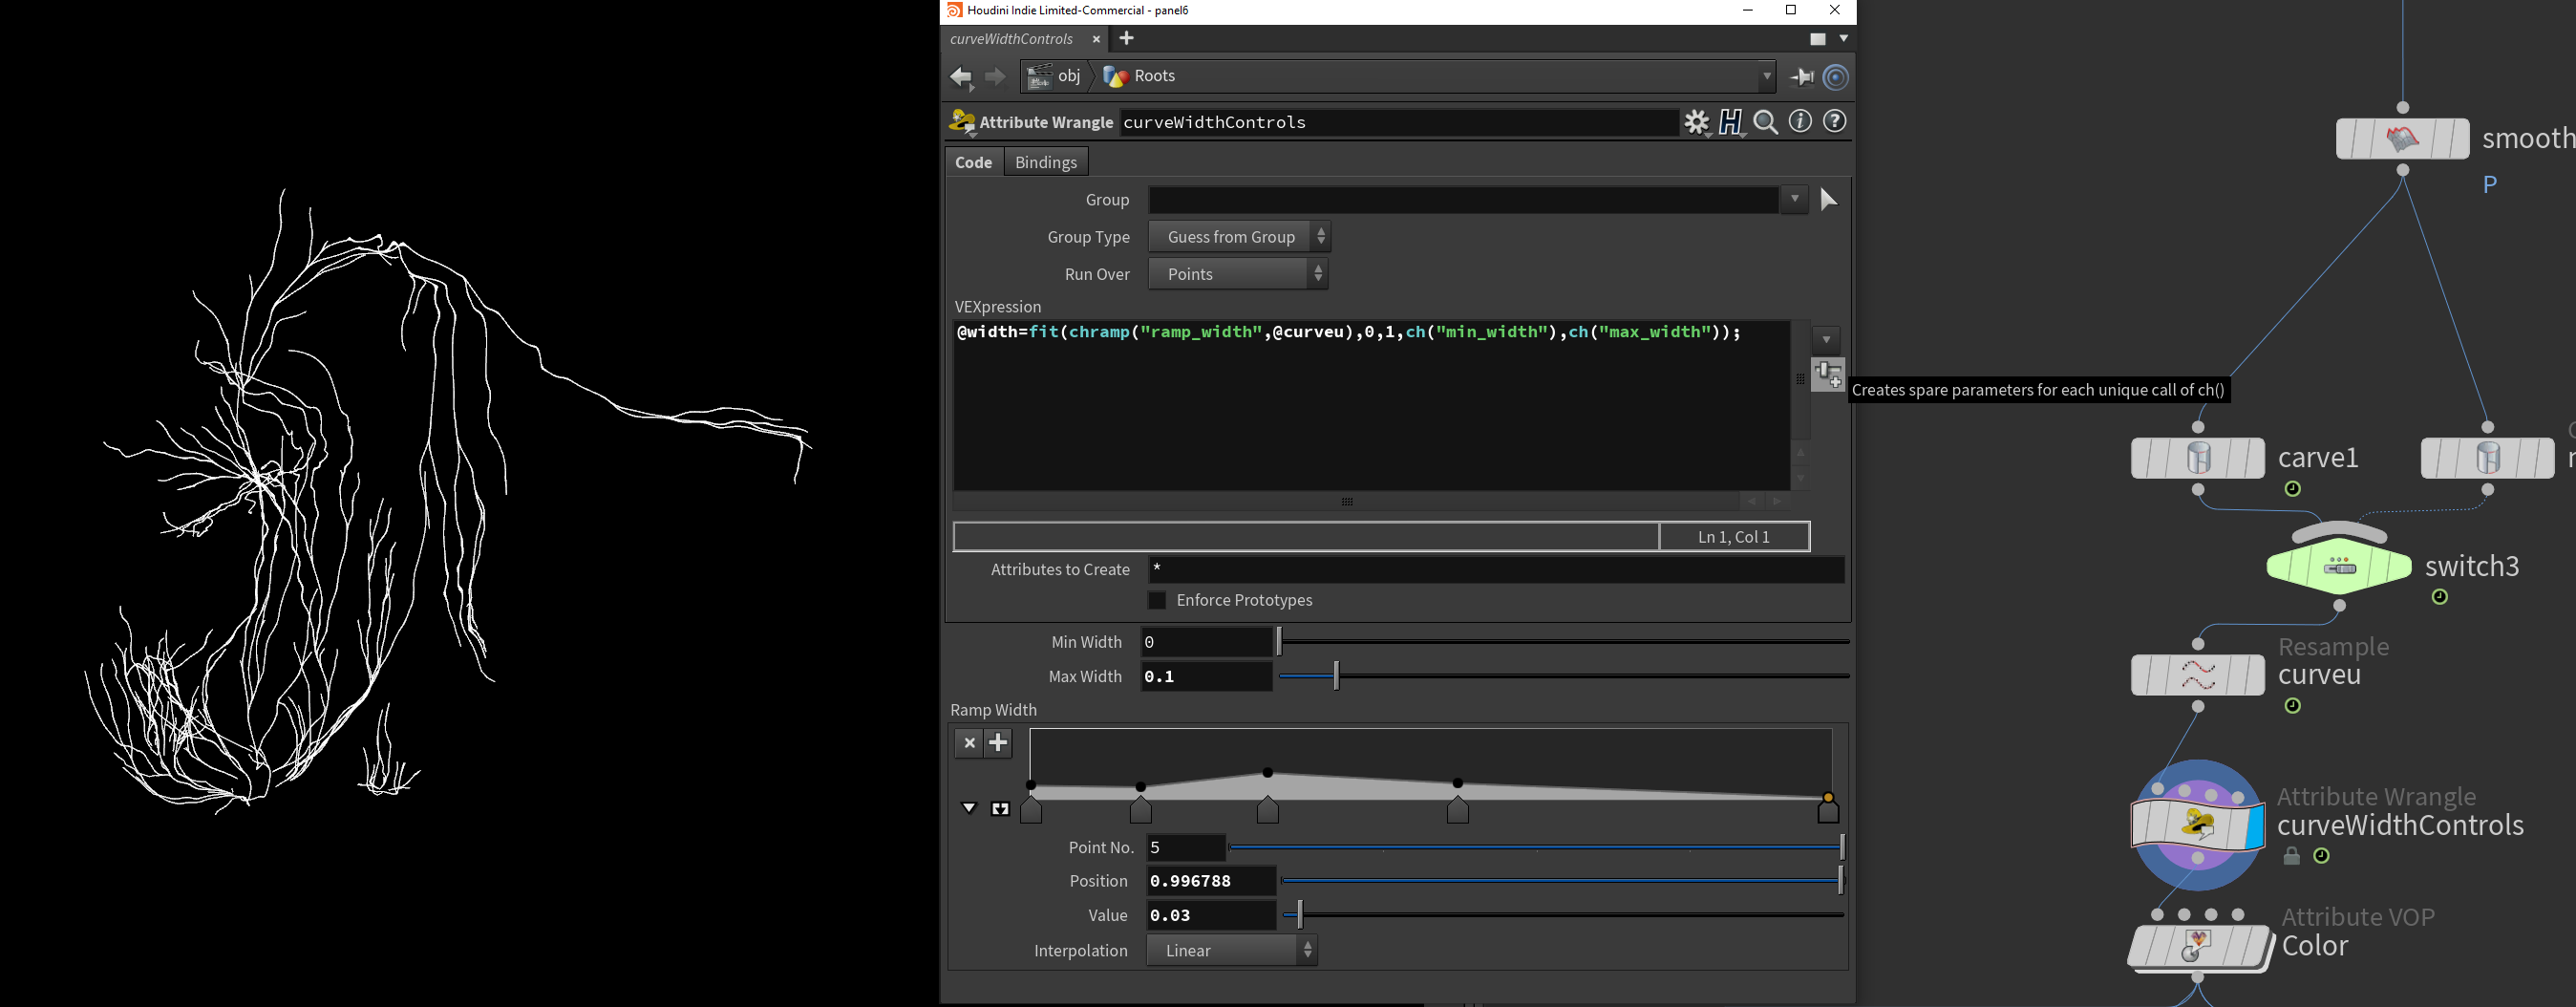
At this point you can add a "resample node" to get the "@curveu" attribute, which need to be created by activating the "Curve U Attribute" checkbox. With this you will get some point value according to the point spacing of the input. Which we will use to add more results like width and color.
First we will create a ramp value to control how wide our curve should be. Add an Attribute wrangle to start coding your own @width control. Our VEXpression will go like this:
@width=fit(chramp("ramp_width",@curveu),0,1,ch("min_width"), ch("max_width"))
Remember to click on "Creates spare parameters for each unique call of ch()", to generate the changes inside our parameter tab.
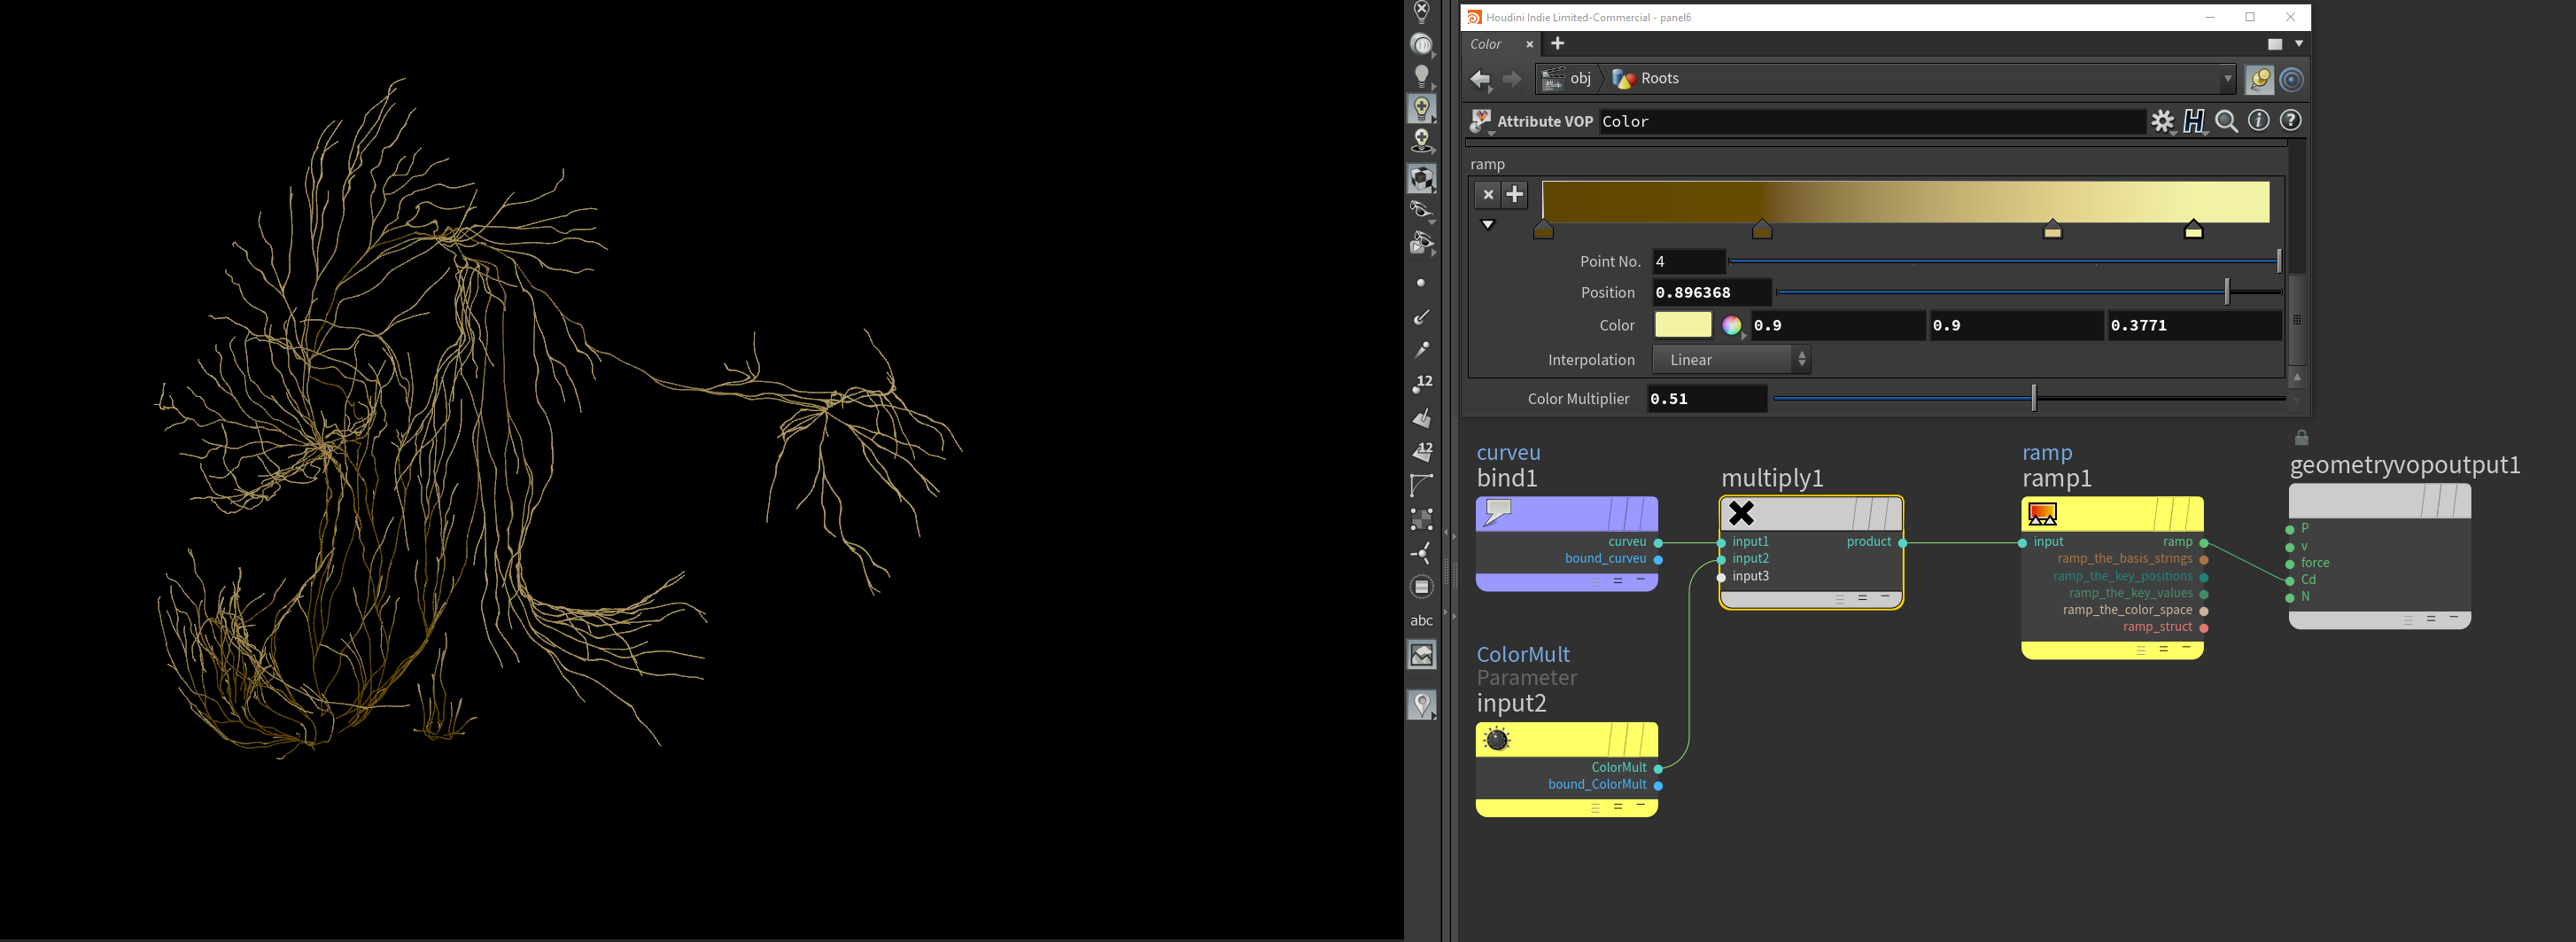
Creating a Ramp, with attribute VOP
As I told you before, there are many ways to achieve your results inside Houdini, so we are going to use the same "@curveu" to create a customizable ramp to add some colors.
Start by creating an attribute VOP and inside call a bind node to bring your attribute inside, inicializate it by adding the name curveu and the type must be float.
Add a multiply node, sometimes I like to create a multiplier to get more value with the incoming results, create a parameter, should be a float too, and it can have any name, I named it Color Mult, it'll be easier for others to play with your parameters if you are clear with the names.
Add a ramp parameter and link the multiply, again add a good name so you could remember what it does.
And finally connect it to your Cd output.
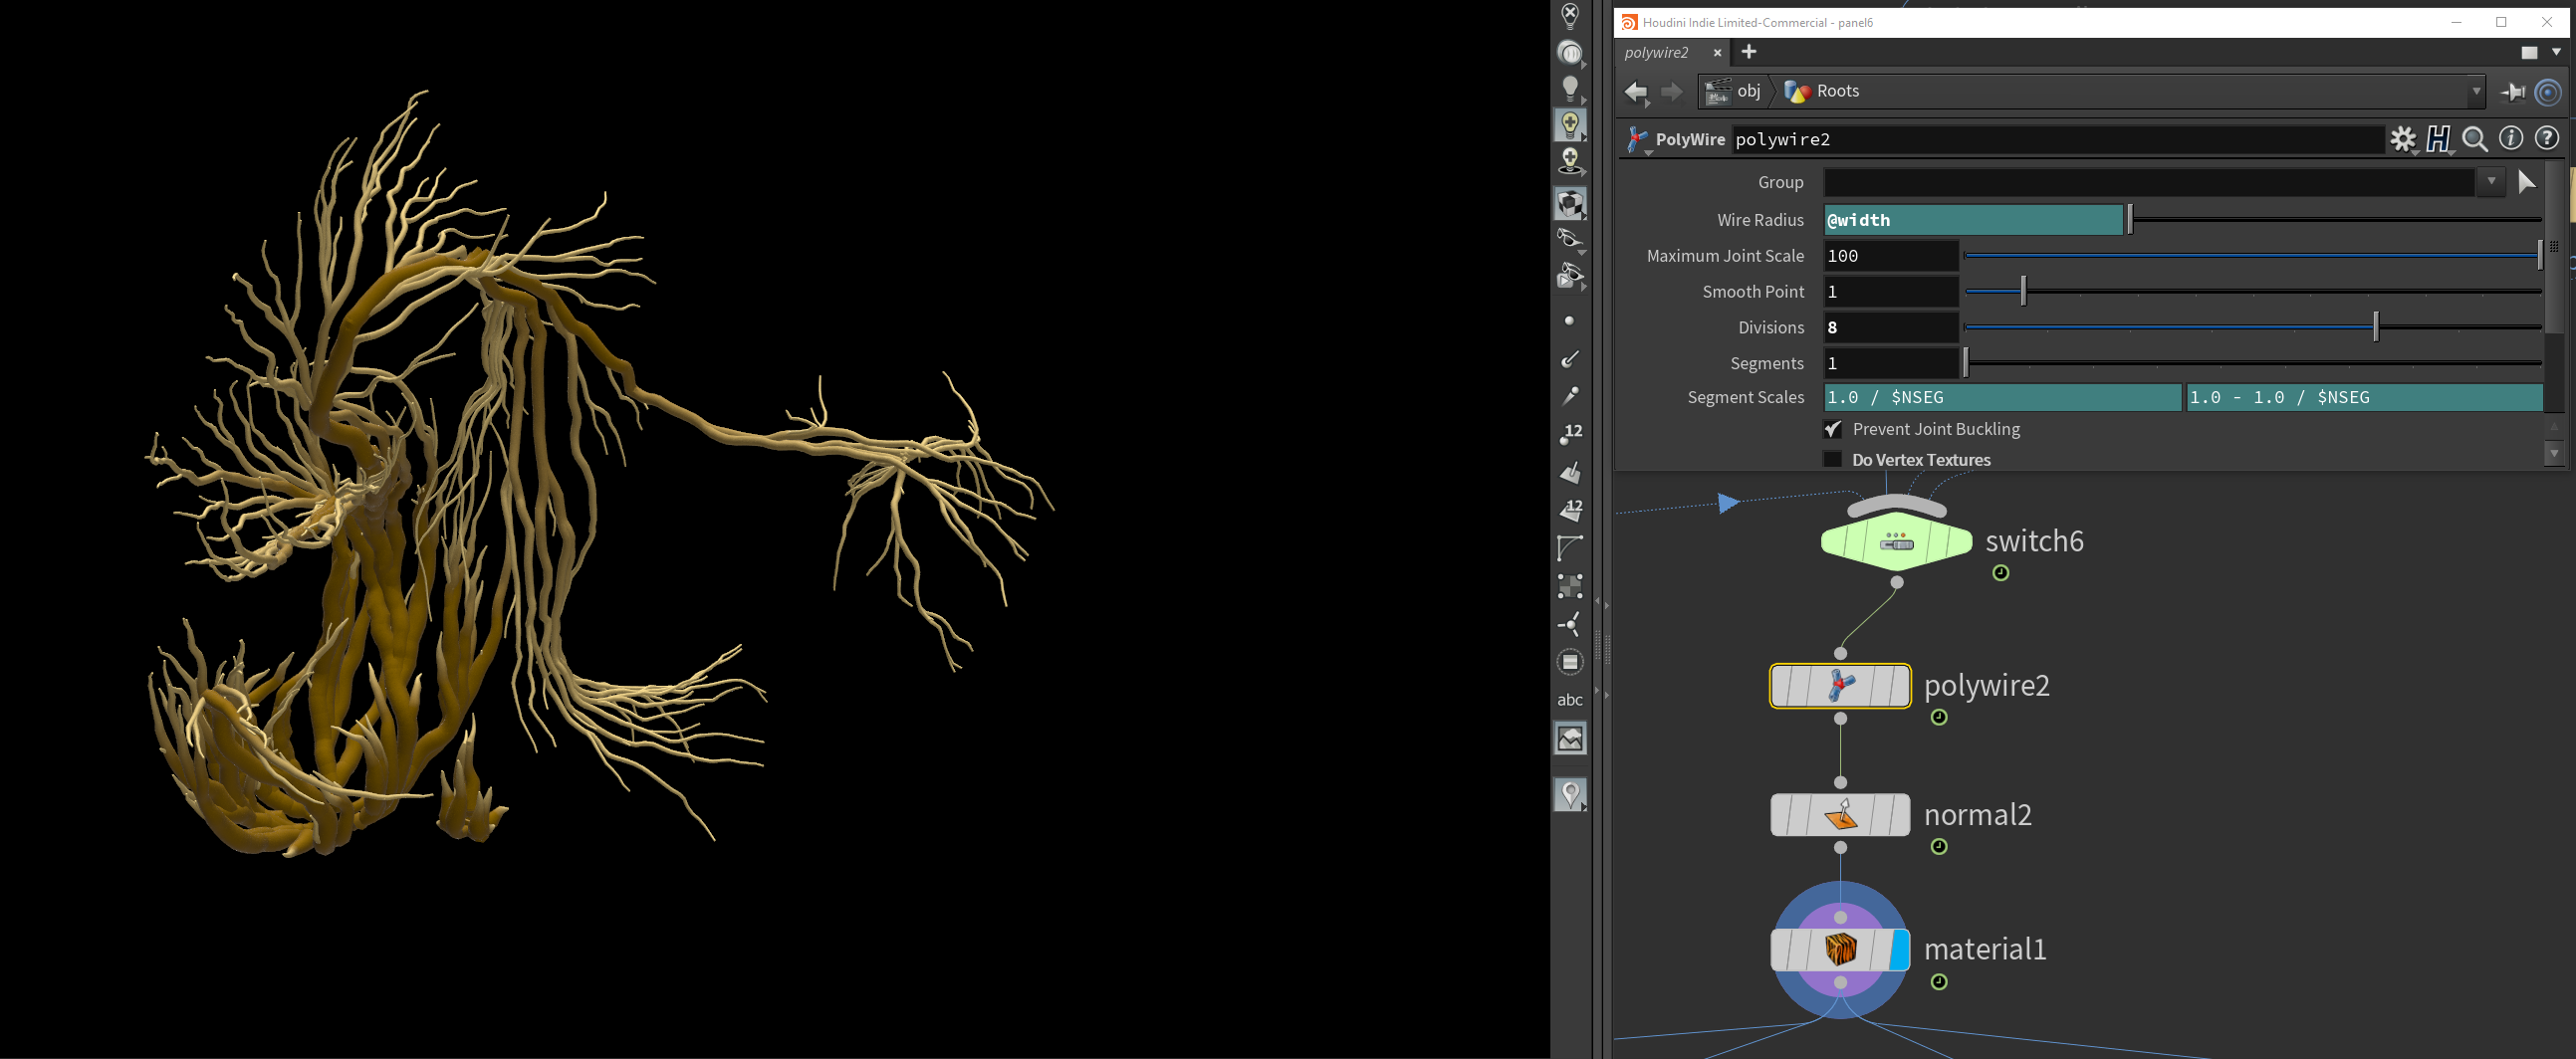
And for the final touch.
Create a "Polywire node", and at "width radius" write @width.
With this your curve will get linked to the attribute we wrote before and then you will have more controls on the width for the curves.
Roots with width
Growing roots over a sand statue
I hope you enjoy this little journey and thank you for walking it with me, if you like it or have any doubts you can send me an email. I'll be glad to help you with any related project.